Activity Name:
Classroom Noise Monitor
Grade Level:
7 (Could work for grades 5 - 8)
Time Required:
120 minutes (approximately 2 class periods)
Expendable Cost:
None
Group Size:
2
Subject area:
measurement
Summary:
Students learn about the gator:microphone sensor and how they can use it to monitor how noisy it is in their classroom. First the students test the gator:microphone to determine what values equate to loud noises and what the noise level is typically like in the classroom. An optional extension allows them to explore the sensitivity of the gator:microphone. After they have an idea about what values correspond to a loud classroom, they design a classroom noise monitoring system using the micro:bit, gator:bit, and gator:microphone to display the information collected and indicate when the information reaches a certain threshold. Students can set up the displays in different parts of the classroom or even different parts of the school.
Keywords:
micro:bit, gator:bit, gator:microphone, sound sensor, middle school, coding, noise monitor, data display
Educational Standards:
ISTE
- Innovative Designer 4a
- Students know and use a deliberate design process for generating ideas, testing theories, creating innovative artifacts or solving authentic problems.
- Computational Thinker 5b
- Students collect data or identify relevant data sets, use digital tools to analyze them, and represent data in various ways to facilitate problem-solving and decision-making.
- Computational Thinker 5d
- Students understand how automation works and use algorithmic thinking to develop a sequence of steps to create and test automated solutions.
- Creative Communicator 6b
- Students create original works or responsibly repurpose or remix digital resources into new creations.
NGSS
- SEP 1: Asking Questions and Defining Problems
- MS-ETS1-1: Define the criteria and constraints of a design problem with sufficient precision to ensure a successful solution, taking into account relevant scientific principles and potential impacts on people and the natural environment that may limit possible solutions.
- 3–5-ETS1-1: Define a simple design problem reflecting a need or a want that includes specified criteria for success and constraints on materials, time, or cost.
- SEP 4: Analyzing and Interpreting Data
- MS-ETS1-3: Analyze data from tests to determine similarities and differences among several design solutions to identify the best characteristics of each that can be combined into a new solution to better meet the criteria for success.
Prerequisite Knowledge:
Students should have some experience programming the micro:bit. Provided they have worked through some of the tutorials on the MakeCode website they should be able to complete the activity.
Learning Objectives:
- Students learn how to collect data using the gator:microphone and represent it using both numbers, lights, and sound.
- Students create a classroom noise monitor that monitors the noise level in the classroom throughout the day. The students choose how they want their noise monitor to represent information to communicate the results to the classroom.
- The classroom noise monitor helps maintain an ideal level of noise in the classroom to ensure adequate learning.
Materials List:
Introduction / Motivation:
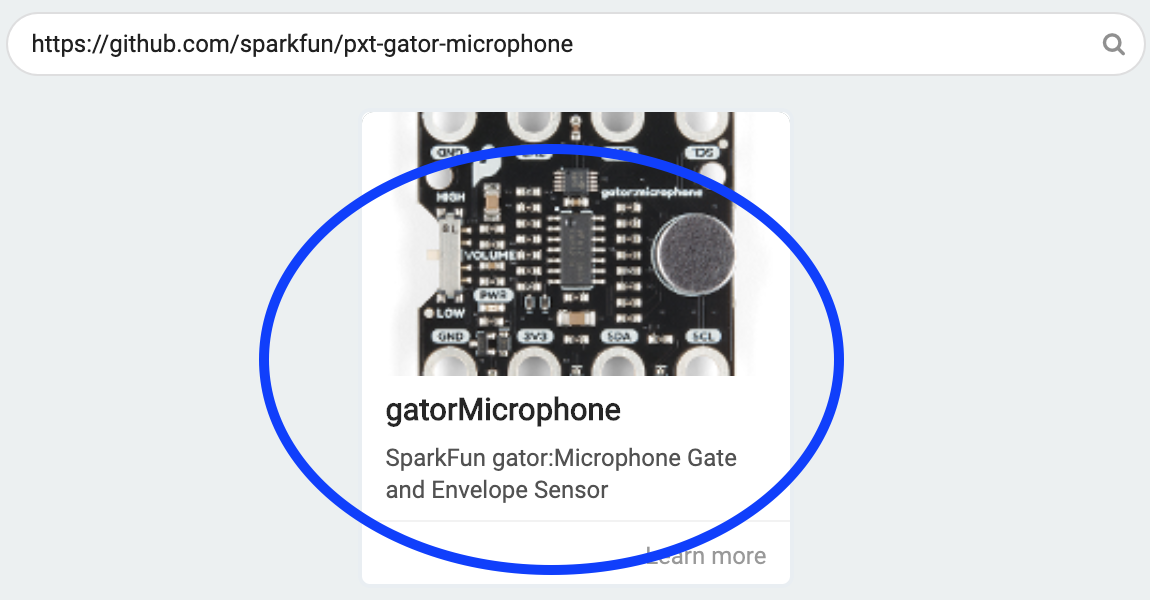
Open up this website, if students have computers/tablets, have them open it up themselves.
Whole Class: (Demo the website for three minutes.) What do you notice? What do you wonder?
(Have them record responses on Intro Activity Sheet)
Individual: Take 3 minutes to explore the website. What do you notice? What do you wonder?
(Have them record responses on Intro Activity Sheet)
(Regroup and have each student share one noticing and one wondering. Record them on the board, large sticky, however you usually record information). How could we use something like this our classroom? (Hopefully leads to some responses like… to make sure we can always hear you and our classmates, so it doesn’t get too loud during group work, …) Would you guys like to have something like this in our classroom? What about other classrooms or places in the school? (Getting at variation in spaces (i.e. the lunch room can be less sensitive to noise than the classroom, but the library is more sensitive than the classroom).
We actually have the tools to build our own noise monitors and we can decide how to tell us how loud it is and how they tell us it’s too noisy.
Procedure:
Background
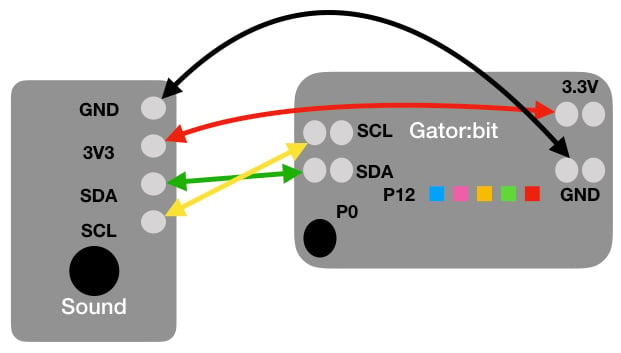
Make sure you are familiar with the different capabilities of the gator:bit and micro:bit. The main ones to focus on here are the different ways to represent information using the 5 LEDS on the gator:bit controlled by pin P12, the speaker controlled by pin P0, and the 25 LEDs on the micro:bit itself (see Figure 1). In addition, make sure you are familiar with the gator:microphone and how to wire it (see Figure 2). There are three blocks for controlling the gator:microphone (see Figure 3). The main thing to remember is to connect the ground wire first to prevent any incomplete circuits. Incomplete circuits can cause parts of the system to heat up.
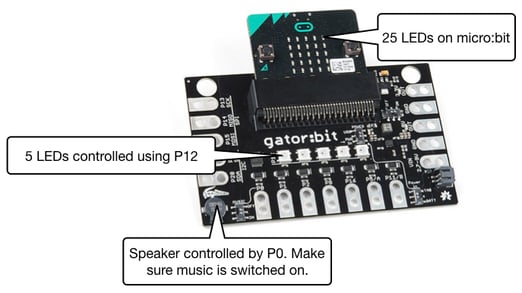 Figure 1: Ways to use the gator:bit/micro:bit to represent information.
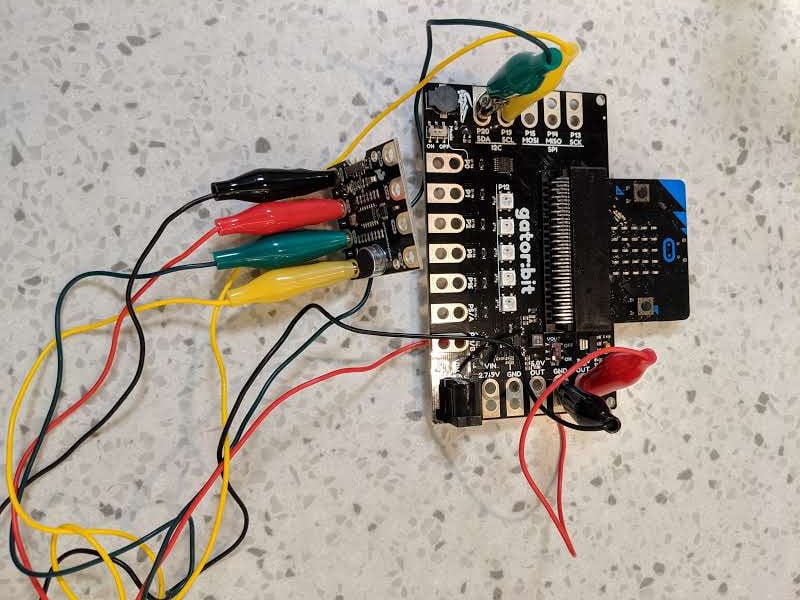
Figure 2: Wiring diagram for the gator:microphone and the actual set up.

|
Measures the sound intensity based on the gain. It ranges from 0 - 2047 which is the encoding of the audio signal picked up on the sensor. |

|
Checks for the presence or absence of sound. Sensitivity is influenced by the gain. |
|
This measures the sensitivity of the gator:microphone. Lower gains mean that the sensor is more sensitive to smaller changes in volume. The default gain is 2. |
Figure 3: Control blocks for the gator:microphone.
Before the Activity
- Separate all the materials so that each group has all the parts they need.
(I recommend printing out the wiring guidelines in this)
- Write up the URLs for the tutorial on big stickies, whiteboard, share them on Google Classroom, etc.
- Print the sound sensor activity sheet that guides students through the activity
With the Students
- Divide the class into pairs and make sure each pair has a set of the materials
- The first step is to calibrate the gator:microphone for different levels of noise
- First students have to wire their gator:microphone using the wiring diagram in Figure 2.
- Confirm that students have wired the sensor correctly by having them share their wiring configuration with another pair of students.
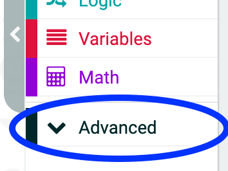
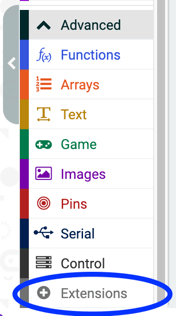
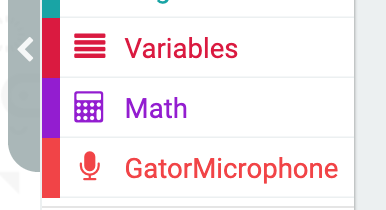
- Now the students are ready to code the calibration. For more experienced coders, they can create a new project on MakeCode and import the gator:microphone library by going to Extensions and searching for this repository (see Figure 4). For students who are less experienced, they can start with this tutorial that imports the libraries and the blocks they need for them. This is an example MakeCode Project.
Figure 4: Sequence of moves in MakeCode to add the gator:microphone.
- Once students have their calibration program coded, they should test it out to get different measurements for the volume. For low volumes, you can have the students step into the hallway, for normal classroom volumes they can stay in the room, for loud noises they can clap, snap fingers, etc. over the sensor. An alternative would be to have the class travel to the lunchroom, library, gym, and other locations throughout the school and take measurements.
- Have students share their calibration results with another pair of students. Results should be similar across groups but may vary slightly depending on the exact level of noise present.
- After the calibration phase, students get to design their classroom noise monitoring system. If students are familiar with the different options on the gator:bit and micro:bit, they can proceed to making a design plan.
- Show students the different options they have for creating their classroom noise monitoring system. This can be done by showing one you created yourself or just illustrating the different features on the gator:bit/micro:bit as shown in Figure 1.
- Before students start to code their classroom noise monitoring system, they need to make a design plan. Use the activity sheet for students to plan their design.
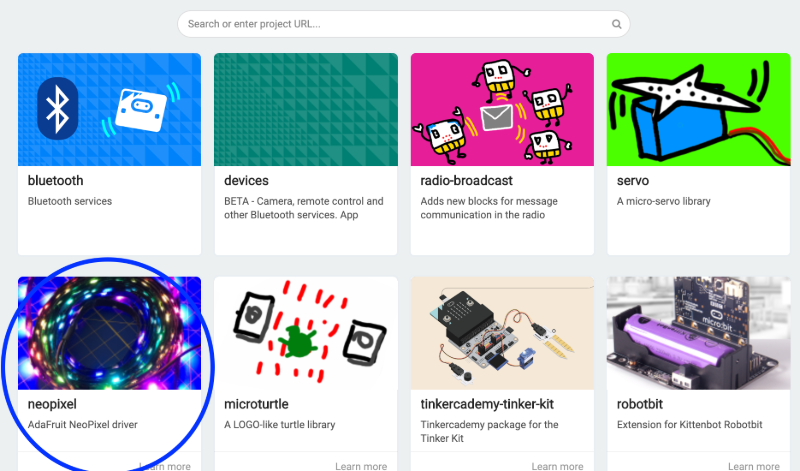
- Now students code their design. Again experienced students can create a new project on MakeCode and import the gator:microphone library by going to Extensions and searching for this repository (see Figure 4). If students want to use the LEDs on the gator:bit they should import the neopixel library (see Figure 5). For less experienced students and students who need extra help, they can use this tutorial which imports the necessary libraries and gives them a set of blocks to work with.
Figure 5: Sequence of moves in MakeCode to add the neopixel library
- Once students complete their programs, have them test it out in the classroom or throughout the school. This is a video example of a possible solution. This is the Makecode Project for the example.
- Students conduct design share outs where they explain their design choices.Some suggested strategies for doing this are
- Have pairs partner up and share with each other
- Break the pairs in half and do a gallery walk. Then have the pairs swap.
- Have each group present their classroom noise monitoring system to the class.
- After seeing each other’s designs, have students answer the last two questions on the activity sheet. These questions help them think about how their design changes depending on the context.
- Finish with a brief whole class discussion on struggles the students had completing the tasks and how they overcame them.
Troubleshooting Tips:
- Coding
- For students with less programming experience. Use the tutorials linked in the instructions that limit the blocks the students see to just the blocks they might need.
- The calibration part will usually be much easier for the students than when they have to make their own display. Students tend to struggle with the logic blocks and it can be worthwhile bringing the group together to go over the creation of an if/then/else statement where they compare noise levels.
- If students are very new to coding, walking through at least part of the tutorial as a class can get students on the right track
- gator:microphone
- Power is usually not an issue, but sometimes having all the LEDs on at full power can cause the gator:microphone to have weird readings. I recommend turning off the LEDs and pausing a few seconds before each reading is taken.
- Wiring
- Make sure that students follow the diagrams
- Make sure that students all ALWAYS connecting the ground wire first
- Don’t have students connect the batteries until they have tested the code when the micro:bit is powered using the USB cord.
- It helps to give students wires that match the colors on the diagram or at least red and black alligator clips for power and ground.
- Displays
- Remind students which pins control the sound (P0) and neopixel LEDs (P12) on the gator:bit
- If using the speaker on the gator:bit, make sure that the music switch is on the on position (it’s right by P0).
Going Further:
- Since individual data points can be incorrect, have students take three consecutive measurements and compute the average.
- For further investigation incorporate the gator:environment sensor to monitor the carbon dioxide in the room. Have students see if there is a relationship between the sound level in the classroom and the amount of carbon dioxide in the air.
- Have students make their system work in a variety of contexts with different thresholds (i.e. a lunchroom mode, a library mode, and a classroom mode).